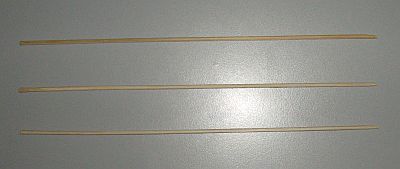
How To Make A Barn Door Kite

Complete Instructions For The MBK 1-Skewer Barn Door Kite

This set of instructions on how to make a barn door kite assumes you know absolutely nothing about kite making. You might already have some of the simple tools and materials required. Anything you don't have is easily bought. If not exactly what I used, then at least something pretty similar!


The instructions on how to make a barn door kite might look awfully long, but that's because they are so detailed. For those who like pictures, every detail is illustrated with photographs too. Just quickly work your way through, skimming over any detail that you don't need. All in all, it should be quite hard to make a mistake!

The MBK 1-Skewer Barn Door Kite is a rather small at 29 cm across and 26 cm tall, with a tail. The 1-Skewer Barn Door is a very nice little moderate wind flier.

Have you read the page on kite materials? If you haven't already, do it now to see what's needed for making a barn door kite.


How To Make A Barn Door Kite - Frame

How to make a barn door kite - spars


  • snip the point off a skewer, then measure it to establish '1 skewer length' for your kite
  • snip the points off another 2 skewers, to exactly the same length as the first one

These will be referred to as the 'spars' from here on.


How To Make A Barn Door Kite - Sail

How to make a barn door kite - template


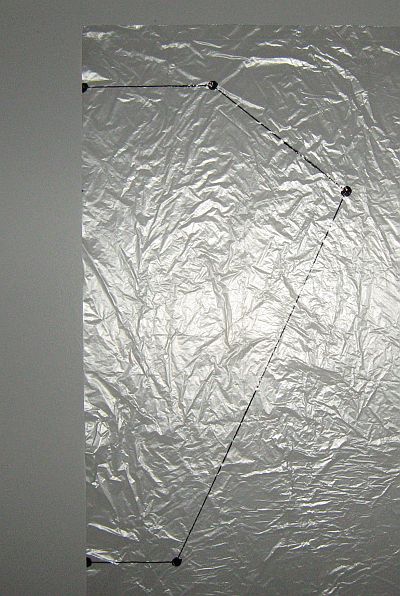
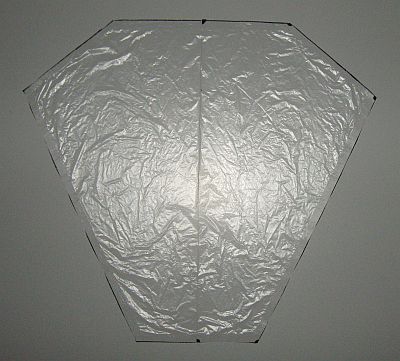
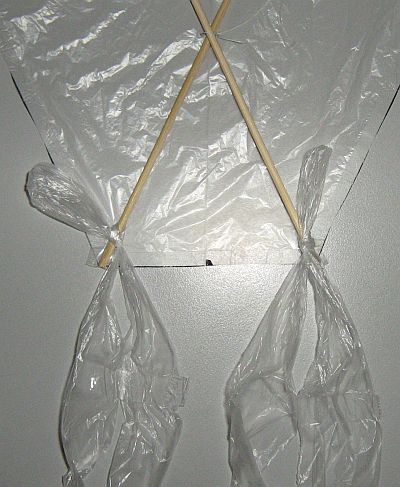
The template shown above represents one side of the kite sail. You will now transfer these measurements to the sail plastic as follows...

How to make a barn door kite - corners


  • firstly, take the large freezer bag that you will be using for the sail, and lay it flat on the table
  • measure and mark the corners of the template shape with dots, as shown in the photo - notice that marks are also made on the side edge of the bag, which is the center-line of the kite sail
  • using the marking pen, rule lines between the dots

Judging 90 degrees to the edge of the bag by eye will be quite accurate enough, if you are reasonably careful. Any small error will be exactly the same on both sides, and the spars will still fit the sail reasonably well. Of course, if you have a T-square, use it!


How to make a barn door kite - sail edges 1


  • flip the plastic bag over, and trace over all the black lines using your marker pen and ruler
  • cut out a rectangular section of the bag containing the kite sail, open it out and lay it flat on the table - you can now see the complete sail outline, as in the photo


How to make a barn door kite - sail edges 2


  • lay clear sticking tape along all the lines with each line showing through the center of the tape - that's 6 pieces of tape in all
  • with scissors, cut along the black lines - this will leave half the width of the sticking tape inside the sail outline

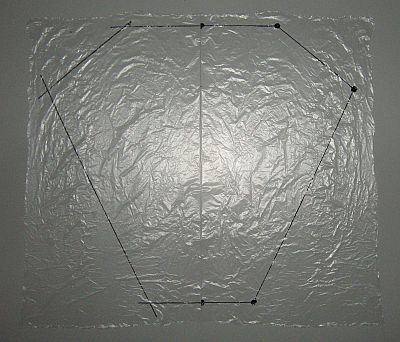
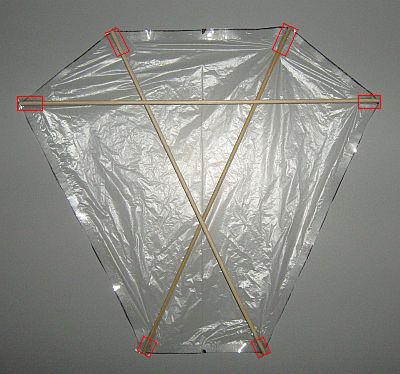
Note: Don't worry about overlapping lengths of tape at the corners, it will all look tidier after the cutting is done.


How to make a barn door kite - spars taped down


The tape is hard to see, so the red rectangles indicate where the pieces are. Also, if any of the spars turn out to be a little too long, just trim with scissors.

  • Place one straight diagonal spar over the plastic, with the edge tape facing up
  • Cap the ends of the spar with tape, as in the photo, by sticking it down over the bamboo and plastic then folding it under the plastic to stick on the other side - a bit tricky, take your time!
  • Do the same for the other diagonal spar, crossing it over the first one
  • Next, lay down the horizontal spar and cap each end with tape - pull the slack out of the plastic, but don't pull it really tight
  • Don't secure the spars to each other at this point - the bridle knots will do that later!
  • If you want to, trim the bits of tape that stick out at the ends of the spars, with scissors - but leave the end of the spar fully covered with tape


How To Make A Barn Door Kite - Bridle

How to make a barn door kite - bridle knots


  • Cut off some flying line to a length of 2 skewers, and tie a very small loop into each end
  • With a spare skewer, poke 4 holes in the plastic sail, where the horizontal spar crosses the diagonal spars - I've marked the holes with black dots in the photo
  • Tie each end of the line to the bamboo, through the holes - use a single half-hitch, and pull tight against the knot of the small loop, securing the crossed spars together (this is the upper bridle line)
  • Now cut off some flying line to a length of 3 skewers, and tie a very small loop into one end
  • Poke 2 holes in the plastic sail where the diagonal spars cross - one hole on either side, as in the photo
  • Use a single half-hitch as before, to secure the diagonal spars together, pulling tight against the loop knot
  • Tie the other end to the upper bridle line, using a Prussik knot (see below)
  • IMPORTANT: Put a drop of glue over each knot that is holding spars together - the spars tend to flex and loosen the knots

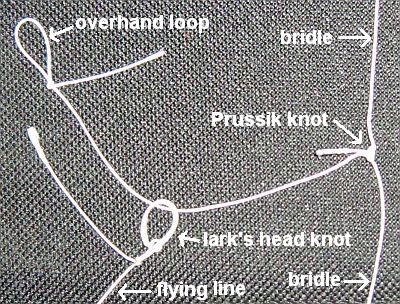
Tip: Use the blunt end of a skewer to help get those little loops through the holes, if you are having trouble!

prussik knot

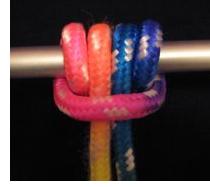
Now take a length of flying line about half a skewer long, and tie one end to the bridle line with a Prussik knot. Tie a small simple overhand loop into the other end, just to get a big knot.


How To Make A Barn Door Kite - Attaching The Tail

How to make a barn door kite - tail


Have you read the page on making kite tails? Assuming you have...

  • Make up a tail from another freezer bag, making sure it is at least 8 times as long as the barn door kite itself
  • Attach each end of the tail to the bottom of a diagonal spar, by poking the end between the bamboo and the sail plastic, then tie off
  • It looks nice if you don't pull too much plastic through, and tie the knots as mirror images of each other - see the photo!

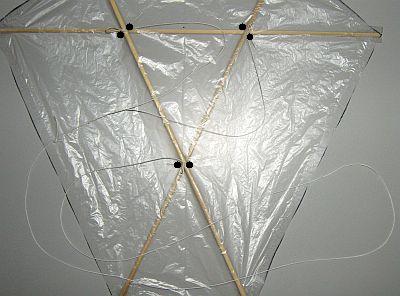
At this point, you've pretty much finished making the 1-skewer barn-door. However, it needs a little dihedral in the horizontal spar before it will fly properly. It's actually unstable if you just leave it flat!

  • lay the kite flat on the table with the bamboo spars on top
  • put one of your thumbs right on the middle of the horizontal spar
  • put your other hand under one side of the kite, press down with your thumb and bend the horizontal spar upwards with your other hand
  • carefully keep bending upwards until the skewer starts to make cracking noises!
  • take your hands away and check the amount of bend in the skewer - repeat the bending until it stays at 20 to 30 degrees away from 'straight', that's 10 to 15 on each side.


How To Make A Barn Door Kite - Preparing To Fly

How to make a barn door kite - attach line


Finally, make up a flying line and attach it to the bridle with a Lark's Head knot. See the photo above.

As a final check, suspend the kite from the flying line. Shift the Prussik knot along the bridle line until the kite hangs at about a 30 degree angle from the horizontal.


How To Make A Barn Door Kite - Flying!

Assuming there is some breeze outside, just dangle the kite at arm's length until the wind catches it. As long as you feel the kite pulling, let out line slowly by letting it slip through your fingers. If it refuses to climb despite pulling on your hand, shift the Prussik knot towards the nose a bit, and try again. Keep going until the kite behaves itself!

Another approach is to get a helper to hold the kite up and let it go, with maybe 10 or 20 meters of line let out. This way, the kite soon gets high enough to make it easy to let more line out.

With the barn door, it is possible that the knot on the upper bridle loop is not quite centered correctly. This will result in the kite tending to fly off in one direction all the time. To fix, keep shifting the knot a tiny amount in the opposite direction until the kite flies better.

How to make a barn door kite - launching


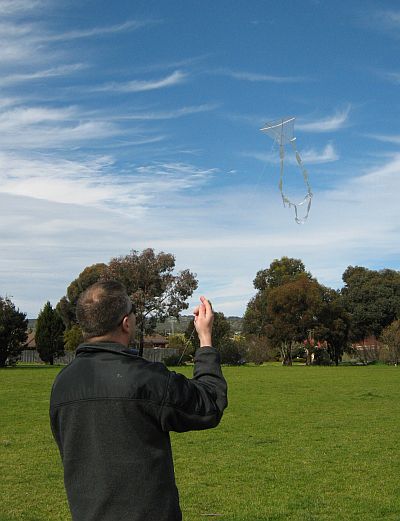
Here's a picture of the MBK 1-Skewer Barn Door Kite being launched, down at a local reserve.

Have fun flying, and I hope you've enjoyed learning how to make a Barn Door kite.

All the above info, plus much more is available in a PDF eBook which covers the entire 1-skewer series of kites.


Last updated: 4 Aug 2008


Return to How To Make A Kite from How To Make A Barn Door Kite

All the way back to Home Page

footer for how to make a barn door kite page