 |
Night Lights
This is my own idea, I have used this method on 2
different kites so far. It will illuminate the entire sail of your kite!
It may not be as slick as some of the store bought options, but it works
and costs a lot less. About $10 total!
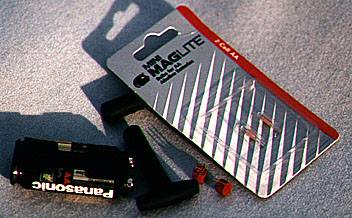
Materials
- 2 AA Batteries
- 2 AA size "MagLite" bulbs
- 2 transistor sockets (NTE part # 417) available from Electronics
supply stores
- 1 battery pack with the 9volt type connector
- 1 9volt connector plug
- A pair of lower spreaders for the kite you want to illuminate
- A pair of "T" shaped leading edge fittings to fit the spars snugly
- Some computer ribbon cable split into 2 pairs of 2 wires each
- Some self-adhesive "Velcro"
- Electrical Tape
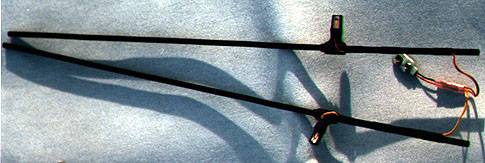
Instructions
(See photos below to better understand these
instructions)
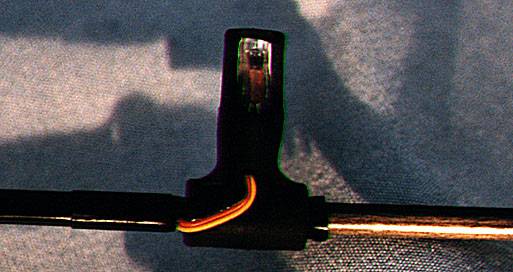
- Take both Leading Edge connectors and cut them straight through the
middle of the part where you would normally insert the spreader, make
this cut to about half way down. Now cut through the front of the
connector through to the cut you already made. This should form a
reflector and shied for the bulb. Refer to the photos to better
understand this as it is hard to describe. At this point you can glue a
small portion of tin foil to the inside of the cut away to form a
reflector.
- Now drill a small hole at the base of each Leading Edge connector to
pass the wires through.
- Take 2 wires of the ribbon cable (leave them attached to each other)
and push about 6 inches of the wires through the hole and out the top of
the Leading Edge connectors.
- From the 6 inch length of wires sticking out of the Leading Edge
connector, solder a wire to each of the 2 outside contacts of a
transistor socket. The middle contact is not used and can be removed.
- Pull the wire and transistor socket down into the Leading Edge
connector until the transistor socket is flush with the cut away.
- Insert this assembly onto a lower spar and position it approx. at
the point that will be the center of one side of the sail.
- Complete the above steps for both spars.
- Assemble the spars into your kite and postion the lights so they
will give the best angle of lighting towards the sail.
- Run the wires sticking out of the base of the light assembly through
the Center Tee hole out to the back of the kite.
- Using electrical tape, tape the wires on the front side of the kite
to the lower speaders all the way to the center tee.
- On the back side of the kite, attach some of the "fuzzy" side of
self adhesive velcro to the spine. This is where you will attach the
battery pack so position it with that in mind.
- Attach some of the "hooks" portion of the self adhesive velcro to
one side of the battery pack.
- Snap the battery connector onto the battery pack and attach the
battery pack to the spine using the velcro.
- Now solder or splice one wire from each light assembly to Each of
the leads on the battery connector, cutting away the excess wire, Be
sure to leave yourself a little bit of slack to work with.
- Now insert a bulb into each socket and 2 batteries into the battery
pack.
- Aim the lights towards the sail for the best effect.
|
|