|
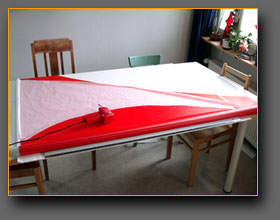
It's good to have some space when making kites. Your table should be big enough for drawing and making cuts. |
 |
On the basis of the plans, draw the kite outline on some transparent paper. Note that you should add a seam allowance (we're using 6mm wide tape, so add 3mm to the seam side of each panel). The trailing edge allowance should be about 12mm to leave enough fabric for making a double fold. |
 |
Cut the two halves of the sail at the same time
on top of each other, so you'll have exactly symmetric pieces. To save
fabric, you can first cut off one half and then place it on the other
one. To hold the transparent template paper firnly in place on top of
the fabric, fix it with pin needles or tape. Remember to align the grids
of the two panels carefully.
|
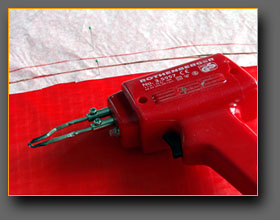 |
Use a hot cutter to cut the fabric. This will seal the cut to prevent fraying later on. |
 |
The two halves now lay one on top of the other and the cutting is done. Carefully separate the halves - the hot cutter has "glued" them together slightly. |
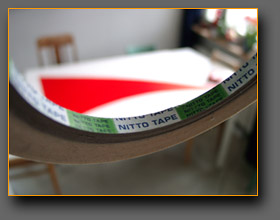 |
6mm wide double-sided tape is good stuff for making seams. The thinner the tape, the better. |
 |
Having attached the two halves with tape, cut a mylar strip to reinforce the spine seam. |
 |
The mylar strip should be about 25mm wide. It will be sewn on later. |
 |
Time for sewing the first seam. Use a three-point zigzag stitch for the spine seam. |
 |
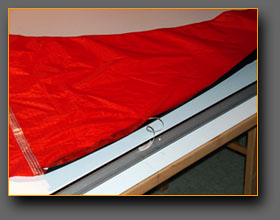
The trailing edge, the tape and the double fold. While taping, pass a dyneema/spectra line (about 50kg ) inside the TE to tighten it and make the kite fly silently. |
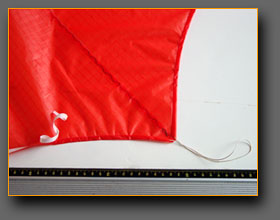 |
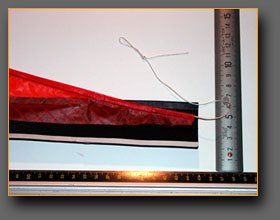
Leave a loop of line of about 10cm in the tail. |
 |
Put the mylar strip in place and sew it and the trailing edge with a straight stitch on the spine (back) side of the sail, the way shown in the photo. |
 |
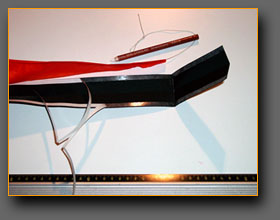
Cut the leading edge dacron about 15cm longer than the final length of the LE will be. Then fold the dacron in half (into a v-shape) lengthwise and attach a strip of the 6mm tape as long as the dacron itself to both inside edges of the dacron. |
 |
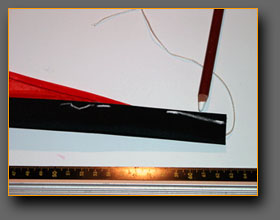
Here's a simplified drawing of the LE dacron. It's easy to attach the it - just remove the paper that covers the other side of the tape 10cm at a time and press the fabric onto the tape. |
 |
Another photo illustrating how to pull off the covering paper of the tape. |
 |
Fold back the extra LE dacron (the last 10cm or so) to strengthen the tip part. |
 |
Here's the tip of the LE folded back and ready. Now fold over the LE dacron and and tape the other side to the sail fabric, the same way you did earlier. |
 |
At
this stage, mark the stitches to be used and their locations on the dacron
with a pencil.
Starting from the tip: a little bit of
straight stitch (sewn slightly slanted), then a gap to accommodate the
leech line coming from inside the trailing edge, then another short
stretch of straight stitch, and from there, three-point zigzag the rest
of the way to the nose. The nosepiece of the kite is made only after
both LE's have been sewn like this. |
 |
The nosepiece consists of two parts. The bottom part is a 70mm wide piece of dacron. For the top part, use car seatbelt material or some other strong fabric. In this photo, the top part is sturdy GoreTex reinforced fabric. |
 |
Glue or tape the pieces together to make handling them easier |
 |
The final taping is done as shown in the photo. Remember to leave a gap for the spine! |
 |
a) After folding
the nosepiece and attaching it to the nose with tape,
|
 |
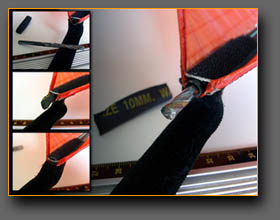
a) Next up is the spine tensioning system. Sew a 7cm long velcro
strip (the "hook" side) on the spine side of the tail. It
won't be taped, so be careful. It the velcro is off-center, the whole
kite will get slightly asymmetrical. |
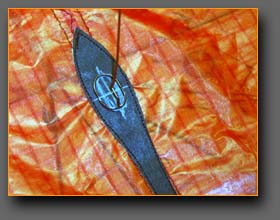 |
Here's the arrow-like end of the dacron and the spot for the lower spreader connector, mesured from the nose. |
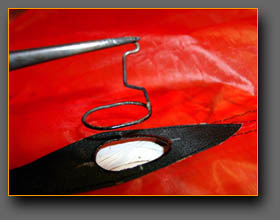 |
The next stage is making a hole for the center T connector. You can make a special tool for the job, like the one I use in the photo, but a hole made with a hot cutter will do just fine. |
 |
The spots for standoffs: take some 25mm wide dacron and cut two 7cm long pieces. Fold them in half lengthwise and cut the ends diagonally. Then sew them on the sail and burn three holes for the standoff connectors, 2cm from one another.
|
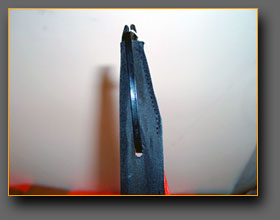 |
Make
a hole at the end of the LE dacron for tensioning the LE. The hole should
be about 5cm from the tip - at the spot where there is a gap in the stitching. You can tension the LE either by using a 3mm wide bungee cord or a cable tie, like in the photo. In both cases, the "knot" should be inside the LE dacron. This way, there will be nothing in the tip for your flying lines to get tangled on. |
 |
Cut out the gaps in the leading edge for the upper and lower spreader connectors. 5cm should be enough. The spots for the spreaders are marked on the plan. The measurements: nose to upper spreader 300mm, upper spreader to lower spreader 640mm and lower spreader to wingtip 540mm. |
 |
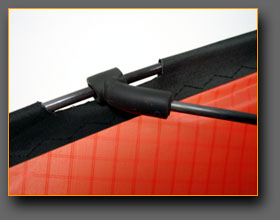
Make the center T connector out of an LE connector. Drill a hole in it for the spine and push the 6mm carbon tube (75mm long) ferrule through the original hole (you can also buy a ready-made ferrule that fits the SkyShark rods). Slide all the rods and the rest of the fittings in place - the kite is now ready except for the bridle. |
|
|
The
anatomy of the Orange.
|
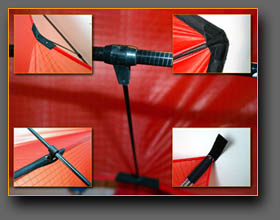 |
Details
of the finished standoffs, spine tensioning velcro, nosepiece and center-T. |
 |
Yoyo stoppers and yoyo guides. The yoyo stoppers improve the After cutting the cable ties, use what's left over for the yoyo
guides. Place the cable tie on top of the LE connector and slide the
ends under the LE dacron. The guide prevents the flying line from snagging
on the connectors when the kite enters a yo-yo. |
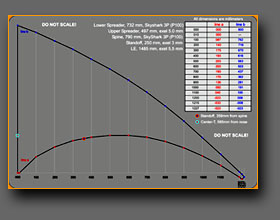 |
The
sail plan. All measurements are millimeters. Scaling the drawing may result
in wrong dimensions, so don't do it. Draw a grid of 10X10cm squares on
a big sheet of paper and transfer the measurements onto it. After that,
follow the instructions. The plan drawing is a PDF file, so you'll need Adobe's Acrobat Reader to open it. If you don't have it yet, you can get it here. |
 |
The
latest bridle, tested and proven to work great. The idea is similar to the Benson Gemini UL bridle, but modified for a single spine kite. This bridle is really very simple - basically just a three-point configuration with an activator connecting the two sides. Yoyos, backspins, flat axels, 540's... all work very nicely with this bridle. |
 |
The alternative
- a turbo bridle. Performs rather similarly to the active one. Which bridle
you choose is up to you.
Both of these bridles succesfully decrease the
wide turning radius |
 |
The spine
weight. It helps the kite in fades, backflips and several other tricks. The weight moves inside the spine (its whole length), so you should use some "shock absorber" material at both ends: foam or cell plastic, soft silicone foam etc. work fine. Push it just inside the spine before you put on an endcap. A suitable weight has a diameter of 5mm and weighs about 8 grams. I've used a 5mm drill bit covered with some thin packing tape. |
|
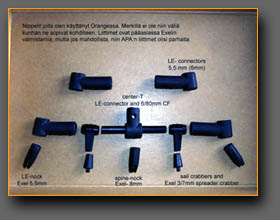
The fittings you'll need for the Orange. Most are made by Exel, but in my opinion APAs are better, at least their LE connectors - they're readily in the correct angle for joining the spreader and the LE. If you can't find fittings of the correct size, use smaller ones and drill them to size. |
|
Materials
|
|