| |
Barn Door Kite Plans
For The MBK Skewer Barn Door Kites
These
Barn Door kite plans are aimed at the more experienced kite maker. They
summarize the far more in-depth instructions to be found under the How To Make A Kite section of this website. It assumes you have the knowledge to do a neat job, use the right knots and keep the weight down! For
all 3 designs, attach flying line to the bridle with a shiftable knot,
for later trimming. Also, all 3 designs work well with light single-ply
plastic for sail material. Many types of large plastic bags are
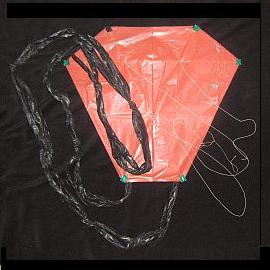
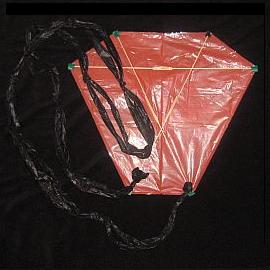
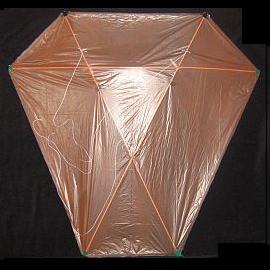
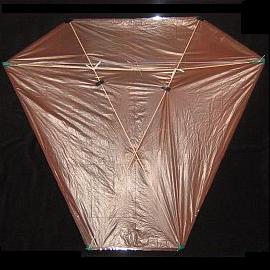
suitable. For each kite plan below, there are also a pair of plan view photos. The one on the left is of the front surface. That is, the surface of the flying kite which faces the flier. The other photo is of the back surface, which exposes the spars.
1-Skewer Barn Door Kite Plans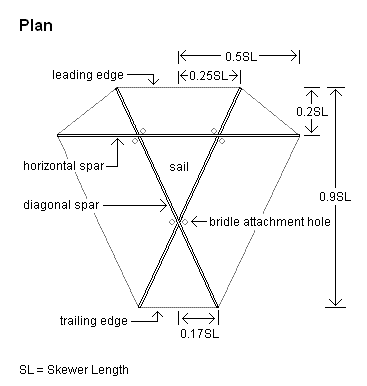
Tips And Hints
- reinforce the sail edges by adding clear sticking tape over the outlines, then trimming back to the outlines
- secure the sail to the spar ends using short lengths of tape
- bend about 15 - 20 degrees of dihedral into the horizontal spar - hearing cracking noises from the bamboo is normal!
- try
a length of bridle line about twice as long as the kite is high, to tie
between the 2 upper attachment points - in each case use a single-wrap
slip knot, secured with a spot of glue
- try a length of bridle
line about 3 times as long as the kite is high, to tie between the
upper bridle loop and the lower attachment point
- for a start,
try making a single tail about 6 times as long as the kite is high,
with each end tied to the bottom end of a diagonal spar, forming a loop
Plan View Photos
2-Skewer Barn Door Kite Plans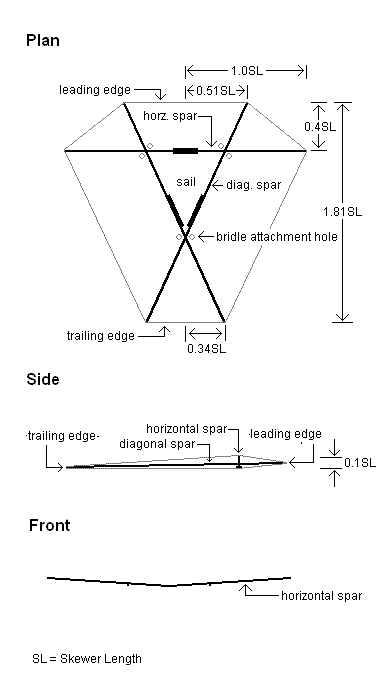
Tips And Hints
- reinforce
the join in the middle of each diagonal spar with a length of skewer,
0.3SL long, glued to one side of the join as in the plan
- reinforce
the join in the middle of the horizontal spar with 2 lengths of skewer,
0.2SL long, glued to each side of the join as in the plan - they stay
flat on the table
- reinforce the sail edges by adding clear sticking tape over the outlines, then trimming back to the outlines
- secure the sail to the spar ends using short lengths of electrical insulation tape
- try
a length of bridle line about twice as long as the kite is high, to tie
between the 2 upper attachment points - in each case use a single-wrap
slip knot, secured with a spot of glue
- try a length of bridle
line about 3 times as long as the kite is high, to tie between the
upper bridle loop and the lower attachment point
- for a start,
try making a single tail about 6 times as long as the kite is high,
with each end tied to the bottom end of a diagonal spar, forming a loop
The PDF eBook 8 MBK Kites To Make - The Complete 2-Skewer Series is useful if you prefer to print out the step-by-step instructions and plans for this kite.
Plan View Photos
Dowel Barn Door Kite Plans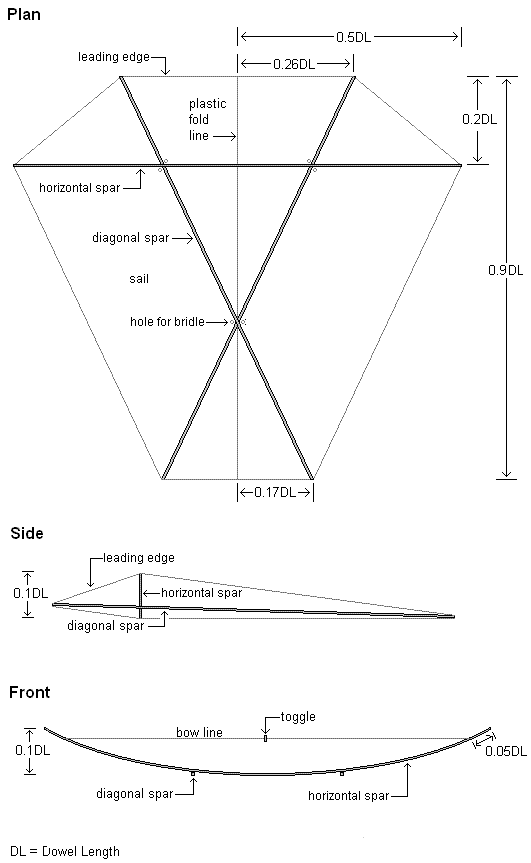
Tips And Hints
- For a dowel length of 1.2 meters (4 feet), 4mm (1/8") dowel works well - for light winds!
- Reinforce
the sail edges by adding nearly the full width of clear sticking tape
inside the outline, then trimming back to the outline.
- Secure
the sail to each spar end using 2 short lengths of electrical
insulation tape. One length goes over and around the tip, the other at
90 degrees to the first tape, with corners folded back under the sail.
- For the upper bridle loop and lower bridle lines, try lengths about 1.5 times the length of the horizontal spar.
- At
the bridle attachment points, a Single-wrap Slip Knot should be
sufficient, secured with a spot of glue. For this design, they also
serve to lash the spars together.
- No tail is required for this kite.
Note: The step-by-step instructions for this kite under the How To Make A Kite section of this website describe how to make a transportable version. That is, a design which breaks down and rolls up like a Sled.
Plan View Photos
Last updated: 17 Feb 2009

|


