

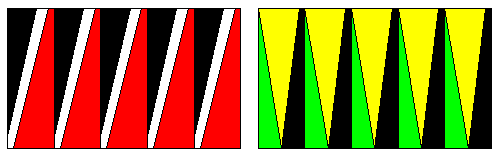
The many tails that we fill the sky with add color and action to our kites, but as many
tails as there are to fly off of our kites, there are ways to make those tails.
Following is a method of making a tail that will change color dominance down its length
to add elements to the flight aesthetic. The construction of this tail uses ideas gleaned
from conversations with George Peters, who did quite a bit to promote and increase
awareness of color in all parts of the sky, Hugh (Stretch) Tucker, who has always been
willing to try something new, and numerous other people too many to remember or
acknowledge.
It should also be understood that this is in no way THE WAY to build a kite tail, but
simply a construction technique that can be applied to many things in kiting. The basic
concept is: Cut twice, Sew Twice. While it is commonplace to cut fabric and then sew it
together again, amazing things can be done by cutting a second time and sewing a second
time.
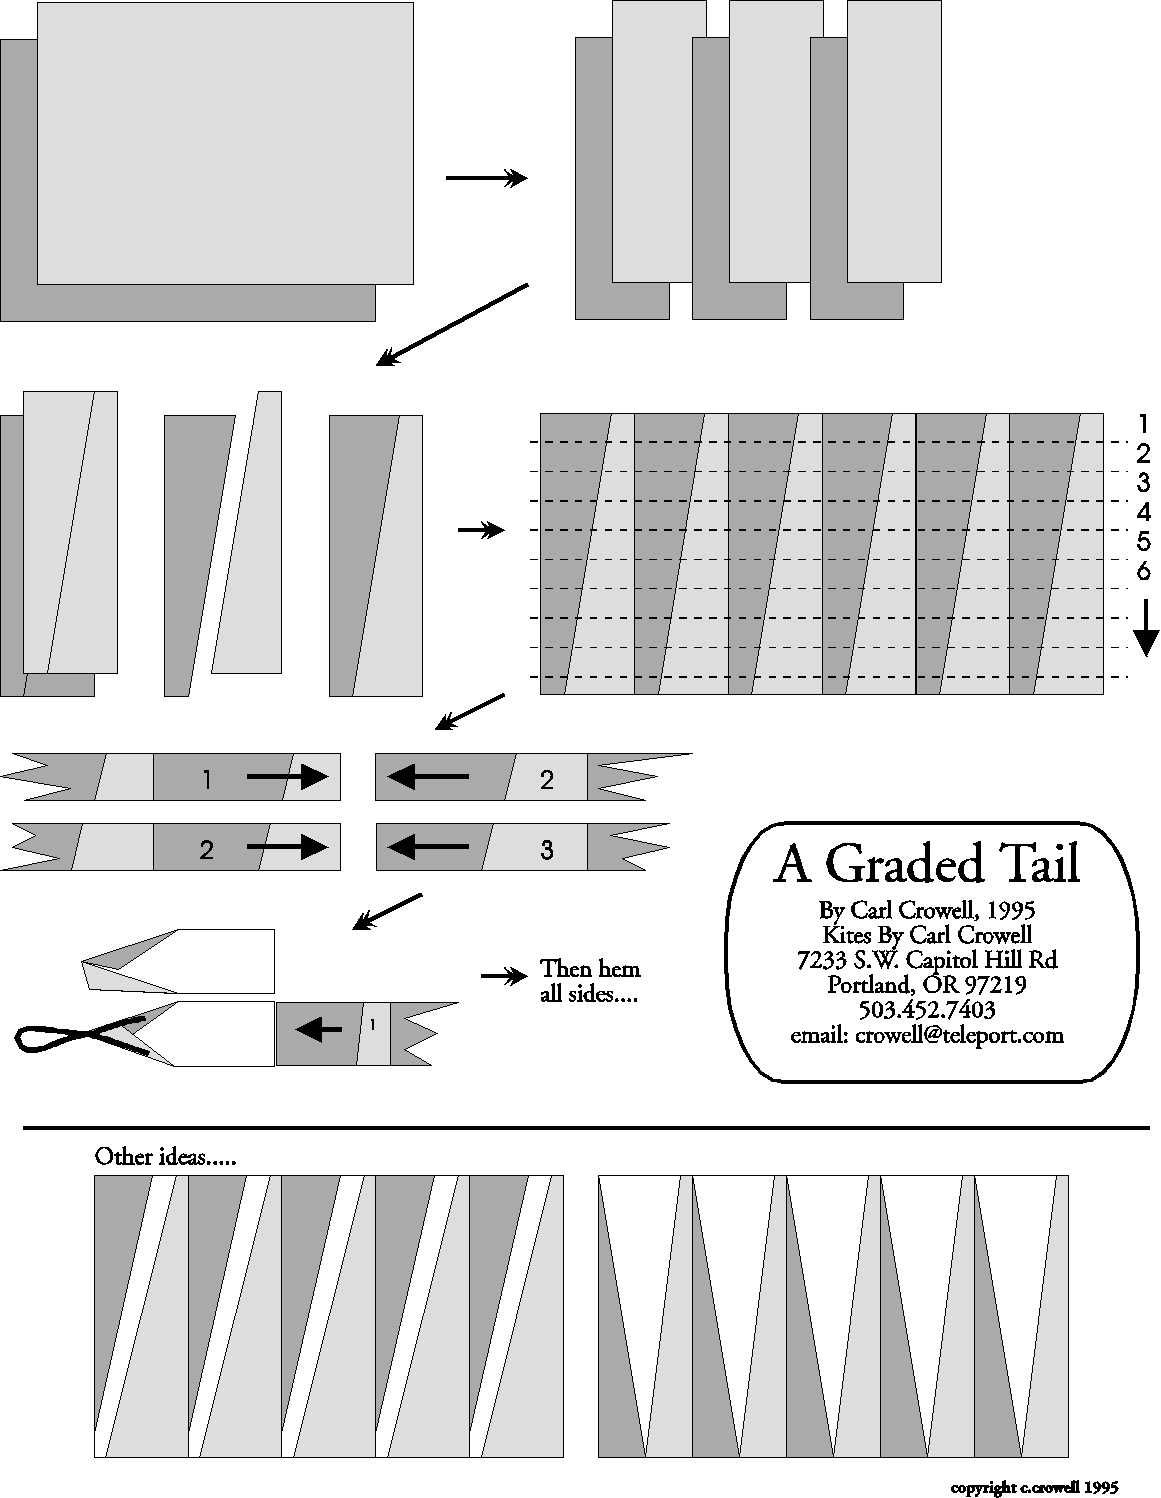
To build your tail, you will need two yards of fabric (two contrasting colors ,
36”x41”), some string (a foot or so...) and a patch of heavy reinforcing cloth
is very nice as well (1.5oz or heavier, 4”x10”).
Step 1: Cut the fabric into six pieces that are 12”x41, three of each color.
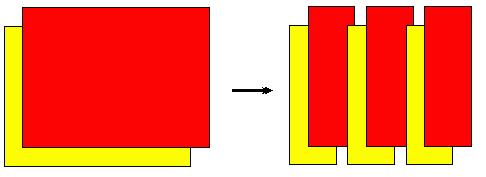
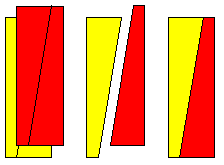
Step 2: Lay the fabric in pairs, one piece on top of the other, and cut matching sets
at the diagonal. Start your diagonal cut about an inch from the top of one side, and go to
about an inch from the bottom of the other side. Carefully lay each set aside, and make
sure that matching sets stay together. The specifics of how you make your diagonal are not
so important as maintaining matched cuts for your two colors.
Step 3: Take one color from each set and sew them together. Make sure that you are
sewing matched pairs. You should end up with six rectangles that are roughly
41”x12” (a little less...).
Step 4: Sew the six rectangles together side to side, maintaining color dominance on
the same side.
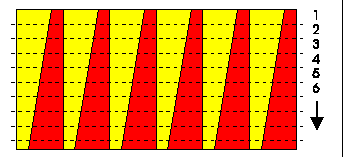
Step 5: Cut your single large piece of fabric into strips 4” wide. You may be able
to get up to 10 strips from your cloth, each piece will be about 4”x68”. As you
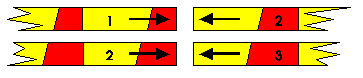
cut them, mark each one with a number. These will have to be sewn end to end in the order
that they are cut.
Step 6: Sew the pieces together, in order, end to end.
Step 7: Sew a reinforcement patch into one end to make the head of your tail. A tapered
head is convenient to attach the tail to your kite. A loop of string sewn onto the head
works nicely as a tie point.

Step 8: Hem the sides and you are done.
More than two colors can be used of course, and colors that do not taper can be added,
just by adding straight strips to the tail. This technique has endless variations and can
be applied not only to the tails of kites, but is an interesting tool that can be used in
designing complex sails for kites as well.
A few other ideas... just to get you started....
For a 150 dpi GIF of the same plans (45k)
All plans are copyrighted. Do not publish or redistribute. Plans are
available for private non-comercial use only.
This page is part of the kite.com system of web pages. Built
and maintained by Carl Crowell
© Copyright, 1998 Carl D. Crowell
Last updated: 09/19/98