The Cocktail Napkin Kite Plan
As seen in the March 1999 issue of Kitelife, the internet magazine.
Minature kites have been around for a long time. In Japan at the new year
kites are flown as wishes and the string is cut so wishes may come true. In
China these kites are also made to represent dreams and problems and are flown
to help resolve them. These minature kites are made of relatively delicate light
materials. They can be flown outdoors but only in the lightest of winds.
Materials Required
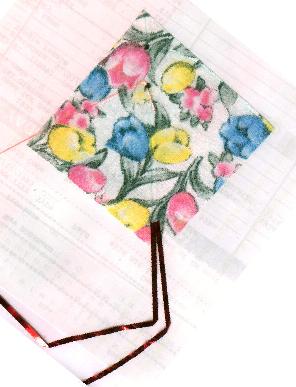
- Minimum 5" X 5 " Cocktail Napkin
(pick out your favourite pattern at the grocery store) - Small spool of 25lb Monofilament Fishing Line for spine
- Small spool of 15lb Monofilament Fishing Line for spreader(cross spar)
- Wood cutting board(to wrap fishing line around)
- Piece of pressboard, newspaper, carboard etc for cutting on
- Small thin sheet of plastic to cut out a template
- White paper glue
- Exacto knife & steel ruler
- Spool of sewing thread for flying line
- Christmas tinsel for tail
- Scotch Tape for attaching bridle and tail
- Drill & small drill bit
- Small plastic lunch bag to store your kite
Template
| There is nothing magical about the dimensions I have used.You can make yours larger or smaller with a little experience. Measure and cut out a template using using an exacto knife & steel ruler |
 |
Dimensions
- 4 3/4 X 4 3/4 inch square
- Mark the Cros spar at 1 1/2"
- Mark the Bridle point at 2 1/2"
- Use a very small drill to make holes at these points.
- The drill has to be wide enough to allow your pen or
- marker to fit through to mark points on the napkin sail
Preparation of monofilament line
The fishing line requires a heat proceess to take the natural curl out of the line. wrap both 15lb and 25lb fishing line around the cutting board. the cutting board should be at least 6 inches wide. Heat in oven at 300 for 1 hour. The idea is that the heat will take out the natural twist in the fishing line. You want straight spars to work with. Please monitor the cooking process & turn the fan on. After one hour remove board and let cool. cut the line to length of at least 6 inchesNote:
If you don't feel comfortable heating/cooking the line you can always spend a little more on higher grade fishing line which contains much less curl in it.
Construction
- Using plastic template cut out skin from napkin using a cutting blade. With a pen or marker mark the of cross spar and bridle point on the sail.
- fold skin along the diagonal & make a crease.
- Mix some glue & water together. Thin the glue enough so it it not lumpy when you apply it to the paper.
- For thr spine, pull 25lb spar line through glue and place along fold in napkin. The spar should overlap on both ends. Don't worry about the excess line as you will trim it off after the glue is dry.
- For the cross spar pull the 15lb through glue and bend spar as shown in diagram. Ensure that the spar is on top of your cross spar mark you made with the template. Again cut ends off line after glue is dry.
- After the kite is dryed and trimmed you just use a a small piece of scotch tape to attach the the bridle line to the bridle point. The last step is to take two pieces of tinsel from 6 to 12 inches and attach with scotch tape to the end.
- The kite will fly better if you grab the center spine and squeeze the original fold so the kite is not flat(form a dihedral)
- When completed store the kite in a small plastic sandwich bag to protect it.
Flight instructions
- Remove the kite from the bag
- Sort the tail from the thread towing line
- Hold the end of the towing line with your fingers with the kite facing you. You may also tape the end of the towing line to a wooden rod or plastic straw.
- Raise your hand and slowly draw your arm across the air, allowing the kite to fly. In a larger space you can walk slowly around the room and pull the kite behind you With practice you may be able to perform a few tricks.
Tips
- You can join as many as you want into a train. I have seen up to seven flown successfully. If you hold a small wooden rod or straw in your hand and tie one end to to the fly line the kite train will fly with a lot less effort.
- You may have to move the bridle a little higher or a little lower in some cases This is a minature kite and therefore if the bridle is off just a little it will have more impact on how well the kite flys.
- If you find the kite is still not flying well remember to grab the spine and squeeze your fingers along the spine to form a curve in the sail. You have to form a dihedral to get the best performance.
 It's me at the Hobby show flying a napkin kite |
This plan took me years to piece together from various sources. People such as, Skye Morrison, well known kite personality. Skye first brought back the secrets from Japan and passed them onto the Toronto Kite Fliers(TKF). The TKF sells these kites to generate funds for the club at Hobby shows during the year. It was Merv Cooper, Treasurer of the TKF who first showed me how to assemble the minature kites at a work shop. I was so fascinated with the kites that my whole family helped whip up 250 of them as party favours for my wedding in 1995. |
- Carlos Simoes