Tying the Bridle
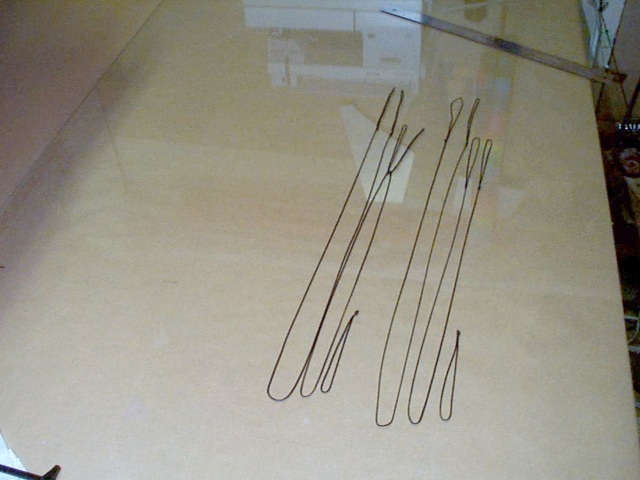
For the bridle you will need 2 lengths of 80# black braided dacron cut 60-1/4", 2 cut 51-3/4", and 2 cut 11". Cut these and put a mark on each end of the lines 5-1/2" from the ends. Fold the lines at the mark and tie an overhand knot leaving a large loop. The two longest lines go from the upper leading edge spreader to the lower leading edge spreader, the shorter line goes between the longer line and the spine, and the shortest line (11") is used as the tow point.
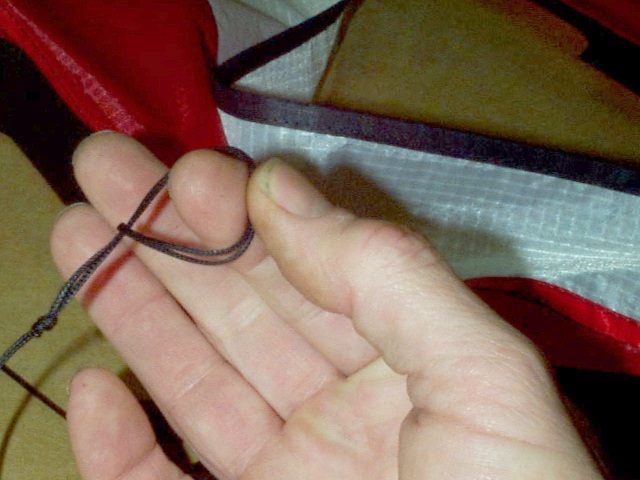
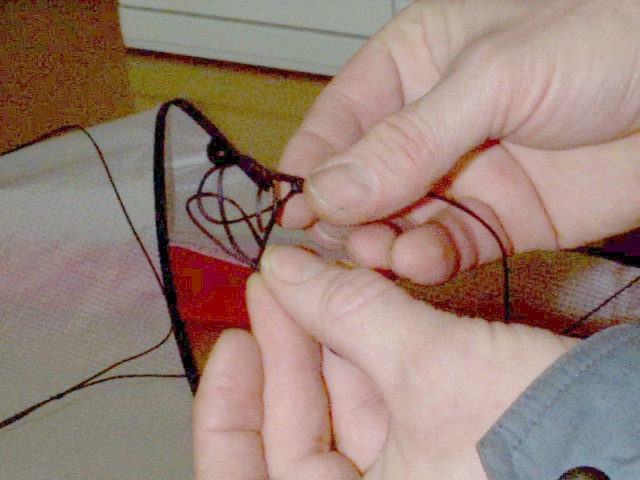
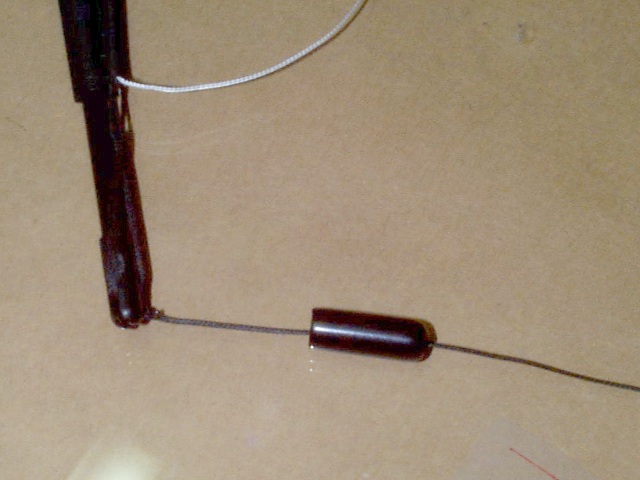
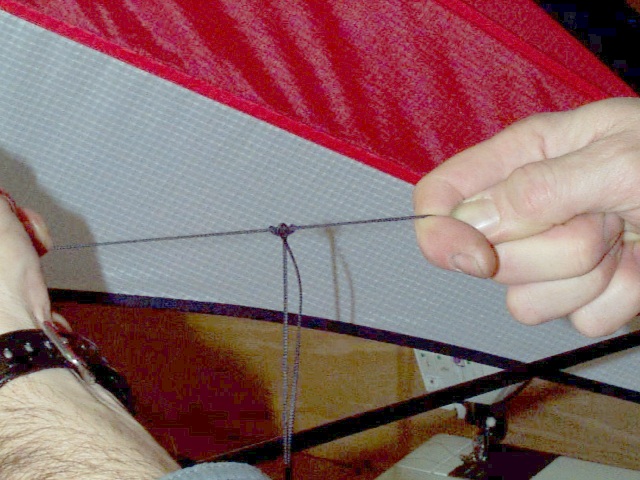
Tie a loop in the loop of both ends of the longest bridle line and
in one end of the shorter bridle line as pictured above. First put
your thumb and index finger through the large loop, wrap your thumb and
index finger around the line and pull it through the loop as in the figure
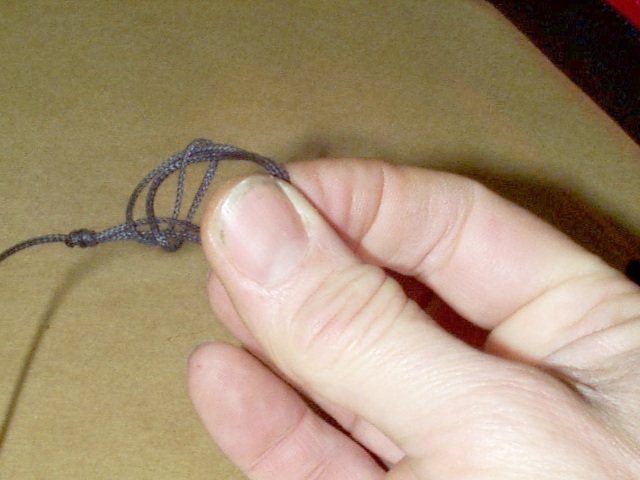
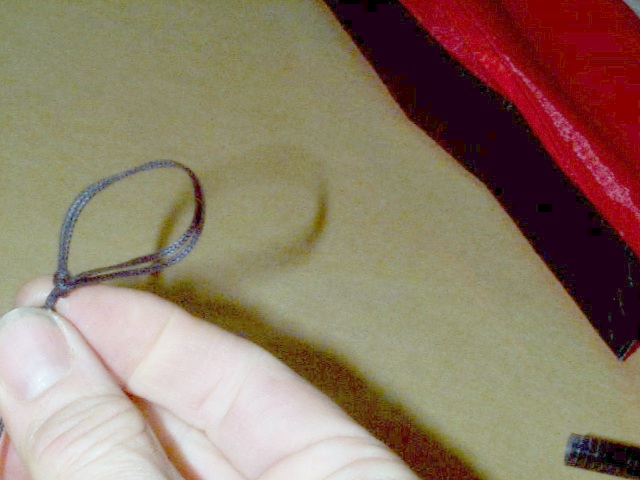
on the left. Next put your thumb and index finger through the new
loop and pull the line through again. It should look like the center
picture above. Do not pull the knot through the loop. Cinch
the loop down on the line.
Now install the upper leading edge spar. Slide the upper leading
edge fitting to the top of the spar and put the ferruled end of the spar
in the leading edge tube through the upper leading edge cut out. Slide
the spar all the way down the leading edge until you can get the tip of
the spar into the cut out. Slide the loop on one end of the bridle
over the tip of the spar and slide the spar up into the leading edge while
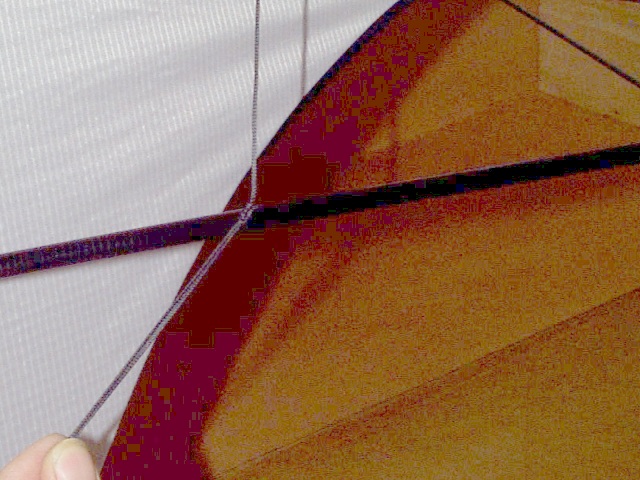
sliding the leading edge connector and bridle line down. The tip
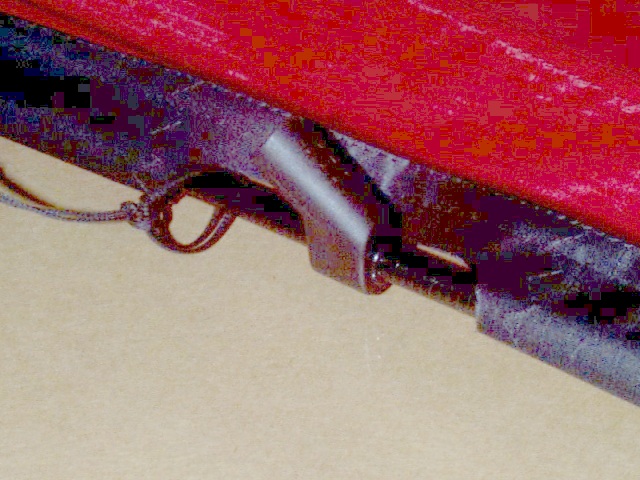
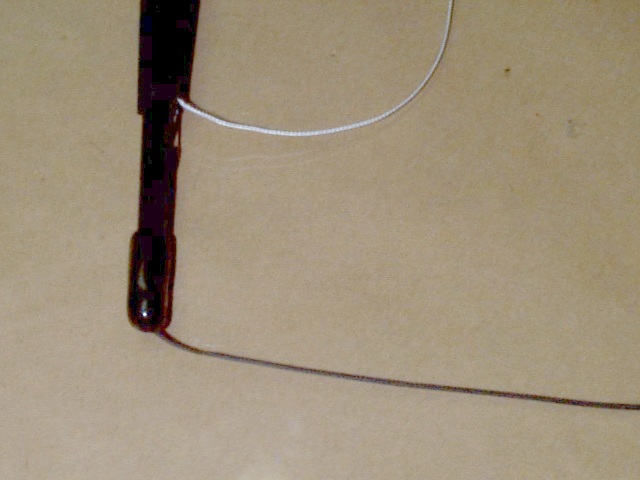
of the spar should fit snuggle in the nose of the kite and the leading
edge connector should be seated against the stopper as shown in the picture
on the left. Slide the lower leading edge spar into the lower leading
edge cut out and down until the end of the spar is at the cut out.
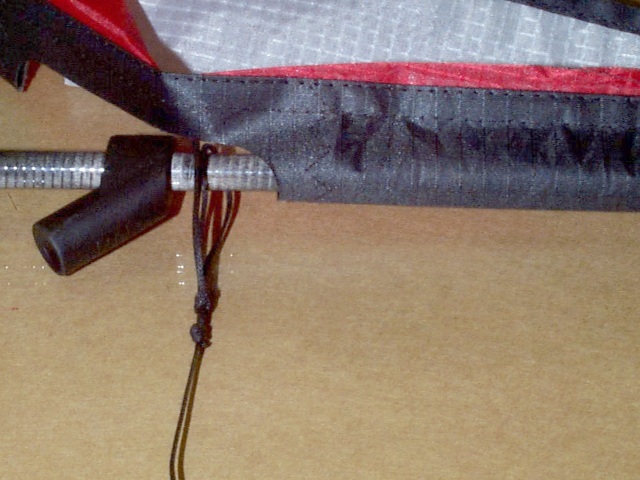
Put the loop in the second end of the bridle line over the spar and the
fitting so the bridle is below the leading edge connector as shown in the
center picture. Slide the spar into the pocket and up the leading
edge while pulling the bridle and fitting down the spar. When the
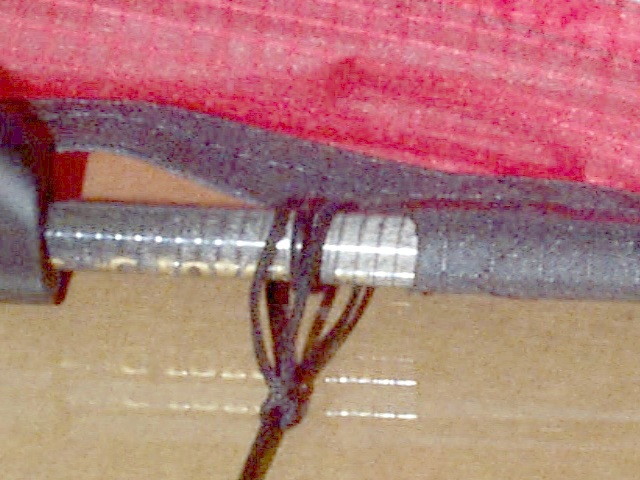
stopper on the lower leading edge spar comes into view loop the bridle
line over the stopper as shown in the picture on the right. Pull
the loop tight and pull the leading edge fitting down so it seats against
the bridle and stopper. Make sure the ferrule on the upper spar in
inside the end of the lower spar. Do the same to the other side of
the kite.
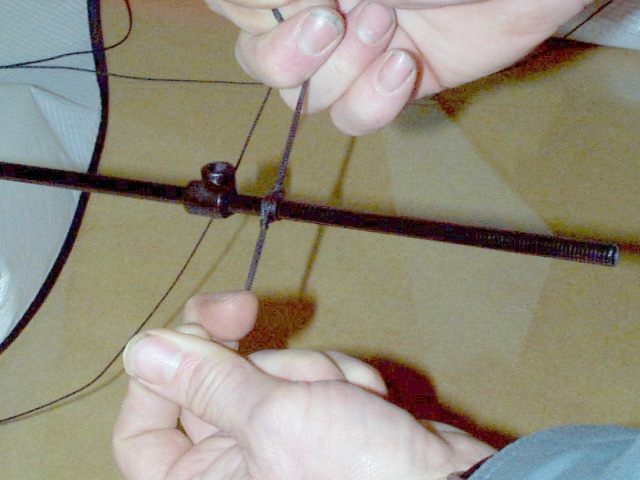
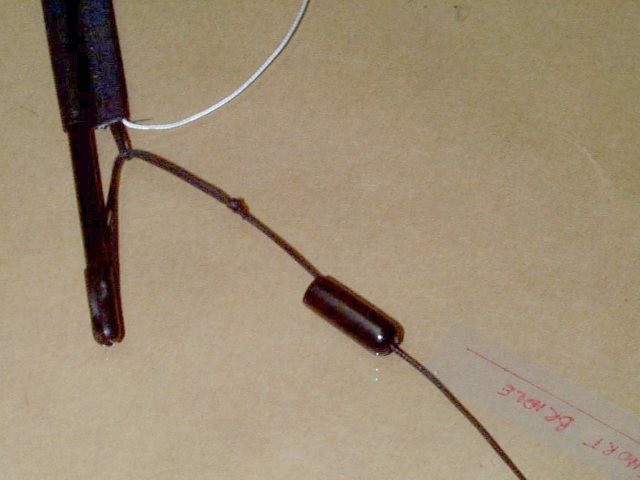
Tie the large loop on the shorter of the bridle lines to the bridle
line attached to the leading edge with a double larks head as shown in
the picture on the left. It is not important at this time where along
the line you tie it. Push the other end through the center T cut out so
it comes out the back of the kite.

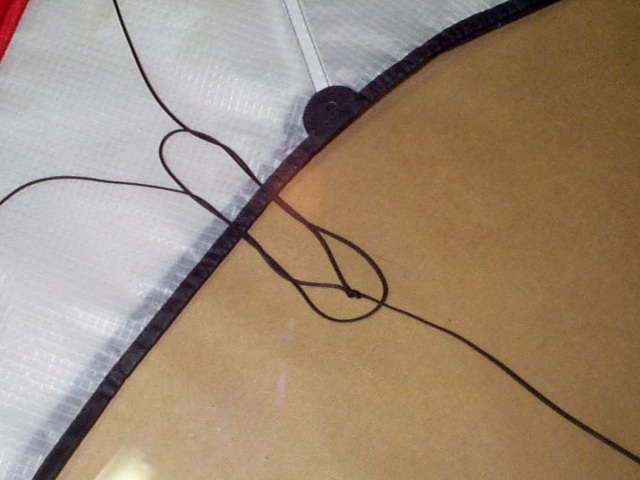
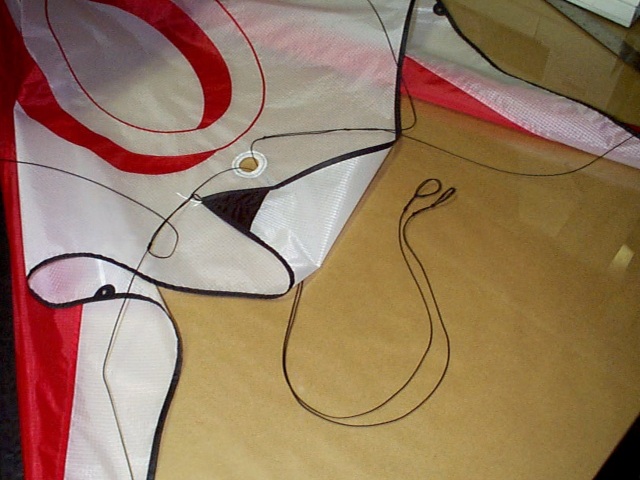
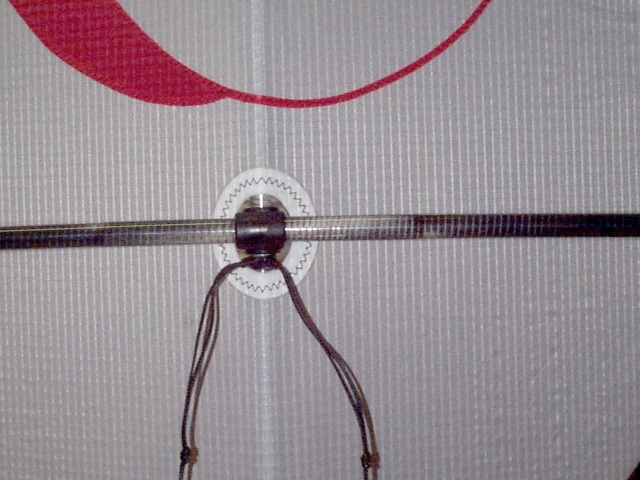
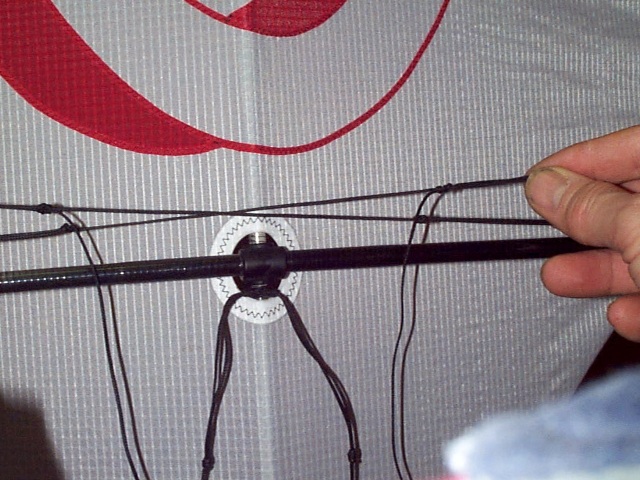
With the two bridle loops out the back of the kite interlock them as
shown in the picture on the left (one loop of one bridle, a loop of the
second, the second loop of the first bridle, then the second loop of the
second bridle). Push the spine through these loops and pull the loops
tight around the spine with the bridle below the center T.
Now to attach the spine to the sail. The pictures here are of
the wing tip, but they are typical of the spine also with the exception
the loop is not attached to the trick line. Start with one of your
tow points to gauge the length of loop you will need. slide one end
of the loop through the small loop sewn into the sail at the tip of the
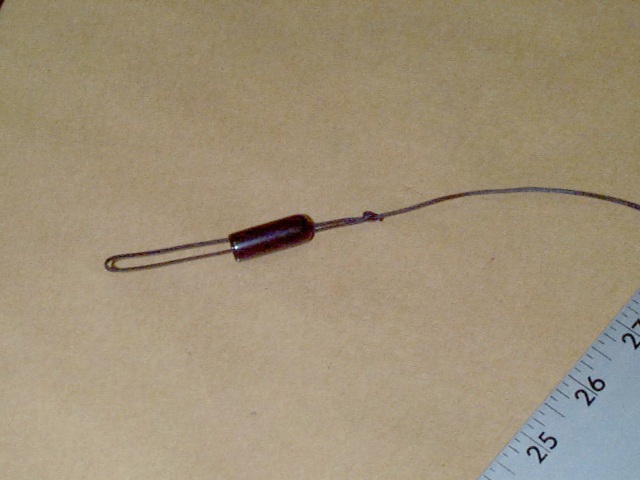
spine reinforcement. Run the loop onto the nock and pull the other end
of the loop up over the nock also. The spine should be tight, but
not so tight as to put a bow in it. Once you get the length figured
out make a loop for the spine and attach the spine. The cheater line
has loops in the ends that tension the sail to the leading edges.
*I* use a piece of 80# dacron cut 116" long for this. If you
made your kite exactly as I make mine you can also. But I would suggest
you start with a line somewhat longer just in case. First determine
how long the loop needs to be that tensions your leading edges. I
use an 11" loop here also so you may want to start with that. Again,
you can check this with one of your tow points. The leading edge tension
should bow the leading edge spars just slightly. Determine your individual
loop size. For the cheater/trick line you need 94 inches of line
between the knots that form the loops on the ends of the line. As
example, I have 11" for the loop on one end, 94" for the cheater line,
and 11" for the loop on the other end, or 116" total. Once you get
this length figured out, put the three vec's (with holes cut in them for
the line) over the line and tension the sail. I cut a single hole
in the end of the vec for the wing tip and two holes in the vec for the
spine for the line to pass through.
Once the tension lines are in place add the standoffs and the spreaders
so the kite is framed for flying. Now tie the tow points on the shorter
bridle lines.
Adjusting the bridle.
With the kite fully framed lay the bridle down against the kite and
pull it snugly toward the center T. The junction between the longer
bridle line and the shorter bridle line should be just above the lower
spreader. Adjust this point as necessary and tighten the knot.
The tow point should be approximately 1/2" beyond the knot in the loop
on the opposite bridle. See the picture above right.
Put the end of the leach line with the loop in it over the arrow nock. Loop the leach line over the spine arrow nock. Pull the excess leach line out the opposite wing tip taking up all the slack. Pull it tight, it will draw back into position. Once all the slack is out of the leach line hold the loose end up to the arrow nock and place a mark on the leach line right at the bottom of the valley in the nock. Fold the leach line at that mark and tie a loop there using an over hand knot. Put that loop over the arrow nock and the bridling is complete. If the kite is noisy when you fly it you can take up slack in the leach line by putting an overhand knot in the line just below the knot forming the loop.
I really feel like I'm babbling.. It's been a long day. Let me know how your kite flys and thanks for the interest in the kite.
dickb