Build 1
The key is the build a kite which has identical trailing edges and leading edge shapes on either side. In order to do this you will take a few precautions.
- build both halves with the same template which insures both sides will be the same
- mark the edges where the sail should stop once hemmed and fold then sew to this line. Others suggest that you cut the sail to the size of the sail plus hem allowances then fold a specific amount and sew. This leaves much more room for error. It is more important that the sail be true then the hem being the same width.
- when making a multi colour sail, do not cut the edges of the kite until all the seaming has been completed. This allows for some error in seaming so that you can make the kite a little bigger (or smaller) if your seems didn't work out perfectly.
Place some green Icarex over the green area, and tape it in place so it will no longer move. Then mark with a pencil along the seam then cut as shown. Be sure to leave excess around the edges so that you can add hem allowances later.
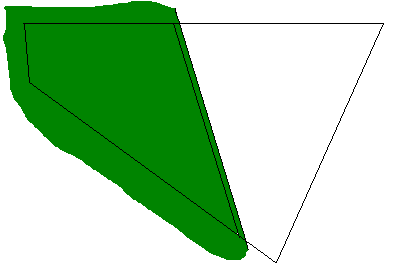
Leave the Green on the plan and place the blue side on and repeat.
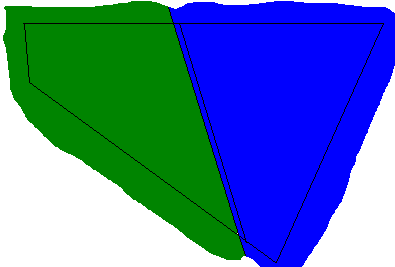
Now that both sides are taped in place
and the seams are over lapign on the correct sides (you decide if you like one
colour over the other).
Use double sided sticky tape (3M
whatever) works great. Place it on
the bottom colour as close to the middle of the seam as possible.
Then place the top colour over top and press it in so it sticks good.
Once the seam is taped together remove both sides of the kite from the
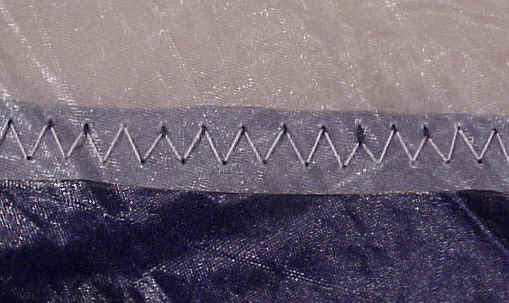
plans and sew the seam with a zigzag stitch.
Since the seam is already taped this is very easy.
take your time try and get the stitches straight and centered in the
seam. Sew past the trailing edge of
the kite so where it will be cut later.
Place the sail back on the plans and tape it in place again. Draw a line along the trailing and leading edge as indicated by the plans. Then add a line around the outside for seam and hem allowances. This numbers will depends on the plans and the skill. Smaller seams and smaller hems look nicer but are harder to do. Cut along the outer line of the sail so you will be left with the following.
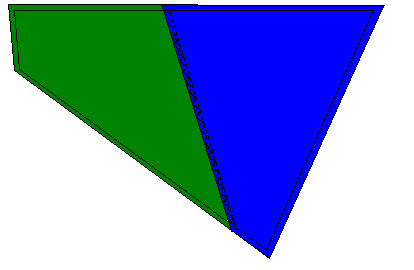
The seam should look like this
Now repeat the same thing with the other side of the kite only remember you will be looking at the back side of the kite so when seaming the two colours together make sure that top colour is the one you want on the bottom:
