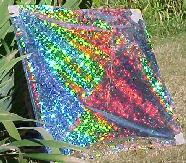
RockA Fighter Kite
 Oregon Kitemakers Retreat
Rockaway Beach Or. 1998
Brian Johnsen
-
Parts List
1 pre-cut mylar sail
1 26" x 0.060" carbon fiber bow
1 19.1" bamboo spine
1 0.25" in heat shrink tubing for bridle anchor point on spine
1 bead for bridle yaw control
1 1 foot piece of line for lashing the spine to the bow
2 1/16" heat shrink tubing for bridle anchor points on bow
2 ripstop nylon wingtip pockets 1" x 3/4"
Fiberglass reinforced tape
2 2.5" x 3/4" pieces to attach the spine to the sail
0.5 inch wide JLAR (mylar tape)
2 1.5" wingtip reinforcement
2 9" leading edge reinforcement
1 21" spine reinforcement
Crystal Clear 2" wide packing tape
2 0.75" x 2" wraps around bow and sail where they meet at leading edge
2 6" x 1" bow to sail from wingtip pocket
4 0.5" x 2" wingtips - holds the pocket on
Bridle
1 6" line - bridle pick point loop
1 12" line - yaw bridle
1 18" line - spine to yaw bridle
Sail
I've cut a symetrical pattern (full sail laid flat) out of formica that I lay out on the mylar sail material and hot-cut all around the perimeter. The curved portion of the leading edge is somewhat difficult to lay out at first because it needs to follow the natural curve of the bow fairly precisely. If you're making just one kite (or a very few), it may be easier to trim the leading edge after attaching the bow to the sail with the wingtip pockets (leave an inch or so of material to trim away).
Assembly
1) Spray water on a flat surface. Lay the skin silver side down and use a squeegee to stick it to the surface. Dry the gold side of the skin thouroghly.
2) Start with the 21" length of JLAR tape down the spine. it will overhang the skin by about a 1 inch on either end. When taping, do not stretch the tape or the skin will buckle or curl. Burnish the tape down and press out any bubbles under it.
-
I get JLAR tape at Great Winds Kites in Seattle
grtwinds@dlux.net
Other tapes do not have a mylar backing, so they will deform more easily than JLAR when over-stressed. The half inch tape seems to be adequate. You can get wider JLAR if needed.
3) Apply the 9" JLAR tape to each straight section of the leading edge. The tape will overlap the straight section by about an inch on each end. Burnish the tape down. Don't stretch it.
4) Apply the 1.5" JLAR tape from the wingtip along the leading edge and burnish.
5) Trim off tape that goes off the sail at the nose and tail.
6) Pull the skin of the work surface and dry it.
7) Fold the spar pockets in half across the long dimension and in half again so that you have a corner pocket. Then tape them to the wingtips on the gold side of the sail. Tape one over the leading edge and one around the trailing edge. Don't tape the pocket closed or upside down. Staple the pocket through the tape and sail paralel to the leading edge.
8) Shape the bamboo spine by carving off the corners of the inside surface and beveling the ends down to the bamboo skin surface. Sand the spine to knock off sharp corners. Put the 0.25" shrink tubing around spine 5" from the tail end and shrink it on securely. Straighten out any bends in the spine by working it with your hands.
9) The Nose and tail of the kite skin are cut flat so that there is a 3/4" straight section perpendicular to the spine. Turn the sail silver side up and apply the fiberglass tape to the nose and tail letting the tape overlap the ends by 0.75". Burnish it down where it covers the sail. Turn the sail over and tape the spine to the sail on the gold side, trimming and folding the fiberglass tape at each end. I slit the tape on each side of the spine from the end of the spine to the end of the tape. Fold that center section over the top of the spine and down the back. The two remaining sides of the tape are folded along the edge of the sail to the end of the spine, pressed down and over the spine. Trim any excess that hangs over the edges.
10) Put the carbon bow between the sail and the spine and place the ends of the bow in the wingtip pockets. Securely attach the bow and the spine using the lashing line about 3.25" down from the nose of the sail. The precise place where it crosses may be slightly up or down in order to force the bow to align with the curved portion of the leading edge.
11) Cut off two pieces of 2" x 0.75" packing tape and secure the bow to the sail where it meets the leading edge on each side. Start with the silver side up and angle the tape at 45 degrees so that half of it protrudes over the leading edge. Burnish it down then flip the gold side up. Wrap the tape over the bow using a tool to press the tape down around the bow before letting it contact the sail on the back.
12) Cut one 6" piece of 2" packing tape and split it down the middle to make two 6" x 1" pieces. Start on the silver side of the sail and place it so that approximatly half of the tape makes contact along the curved part of the leading edge. Don't overlap the pocket. Burnish it down then flip the gold side up. Make slices in the free edge of the tape at about 0.5" intervals perpendicular to the bow. Don't cut into the sail material. Bend each of the tabs around the bow taking care to press it tightly into the space between the bow and the sail.
13) Cut some 0.75" squares of packing tape and place them between the sail and the bow under the bridle points and burnish them down for reinforcement. Melt holes in the sail for each of the 3 bridle attachement points at the outside edge of each piece of shrink tubing on the frame.
14) Attach each end of the 12" line to each side of the bow with the loop on the silver side of the sail. Attach one end of the 18" line to the tail bridle point. Slip the center of the 12" loop through the bead creating a larkshead knot around the bead, centering it over the spine. Tie the free end of the 18" line through the bead and legs of the 12" loop. Gather both ends of the 6" line together and tie a single overhand knot in them. Pull the loop securing the knot tightly, then attach it to the 18" leg of the bridle using a double larkshead or Prussik knot.
15) Put a slight bend in the spine down at the level of the wingtips.