 Kite Plan
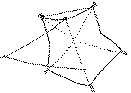
| Skin | 1 sheet of Washi or similar 62cm by 46cm | |
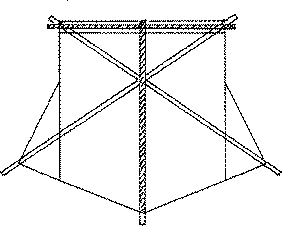
| Frame - bamboo | 1 off 2mm by 5mm 47cm long (top spar) 1 off 2mm by 5mm 62cm long (spine) 2 off 2mm by 4mm 73cm long (diagonal spars) | |
| Bridles - Linen, cotton | 2 metre long for bridle 1 metre long for bow line | |
| Glue | PVA (white glue) Aquadere or similar | |
| Paint and Indian ink for outline Water based dyes or food colouring etc for pastels and shading. | ||
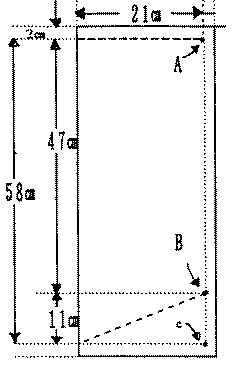 |
1. Drawing the outline Fold the washi in half so the smooth side is in. If using a substitute material the smooth side will be the side that you later paint. Draw the lines as shown for the kite outline on one half of the kite. Draw a 1 cm margin (hem allowance) around the kite sides and bottom outline and a 2 cm margin at the top. By using a bamboo skewer (satay stick) or a pin etc make a small hole at points A, B and C. This will ensure that your kite is symmetrical. |
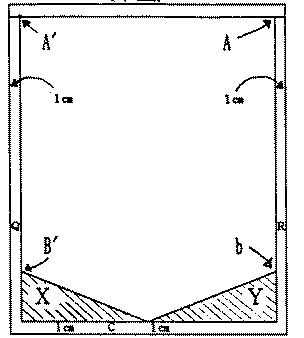
| Unfold the paper and draw connecting lines to points B´ and b. Draw
the margin (hem allowance) around the outline on this side, 1 cm for the
sides and bottom and 2cm at the top. Cut off the shaded sections X and Y. |
 |
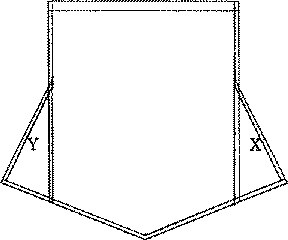 |
Glue the pieces X and Y on to the opposite sides of the kite
as shown overlapping the 1cm hem. Place the washi smooth side down and fold/crease around the kite outline. You should now have a kite skin with a crease line that distinguishes kite and hem allowance. |
| 3. Framing Make sure the skin is dry. Place the kite skin face down and apply a thin coat of glue to the hem allowance. Fold at the crease mark of the kite outline and with the exception of the top hem glue all other the hems down on the back side of the kite. With the exception of the top 2cms apply a thin but thorough coating of glue to one side of the vertical bamboo spar and place in position so that the bamboo extends approximately 5mm above the top of the kite. Apply a thin but thorough coating of glue to one side of the bamboo diagonal spars and place in position as shown in the diagram. Repeat for second cross spar. Glue the top horizontal spar so that the spar edge sits on the kite outline. Cut a nick into the washi around the vertical spar and glue and fold the 2cm hem down over the top of the bamboo.Glue small pieces of Washi as reinforcing over the corners and spar intersecting points on the back of the kite. |
 |
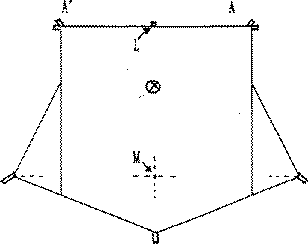 |
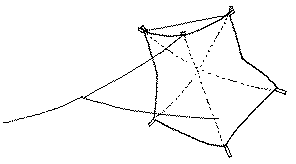
4. Bridling Make a small hole with the skewer or pin etc at point L just below the join of the vertical and horizontal spars. Feed from the front of the kite one the ends of one of the 3 metre bridle line through this hole. Loop the end back through the hole several times to ensure the bridle line is lashed around both spars. Then knot the line. Mark a point at the intersection of the centre vertical spar and a line joining the two side points of the kite, M on the diagram. Make a small hole either side of the vertical spar. Feed from the front of the kite the other end of the 2 metre bridle line through this hole. Loop the end back through the hole several times to ensure the bridle line is lashed around the spar. Once again knot the line. Mark a point where the spine and diagonals cross on the front of kite skin. Take the steel washer and feed the bridle loop through it. Then slide the washer along the lines until it comes to rest over the mark you have just made. Hold this spot and at the same time tie the end of the line with an overhand knot. This will give a bridle with the top leg being shorter than the bottom. |
| Bowline Tie the 1 metre line across the back of the kite from one end of a spar to its opposite side ensuring little or no slack. Flying |
 |