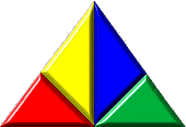
Tube Tail Tutorial

Every kite can use a tube tail to add to the overall greatness of
their kite. Some large kites can have more than one tail. I have seen
them with up to six tails.
The tails are made out of the same coated ripstop fabric used on all my kite plans.
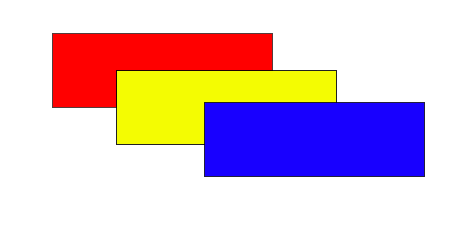 |
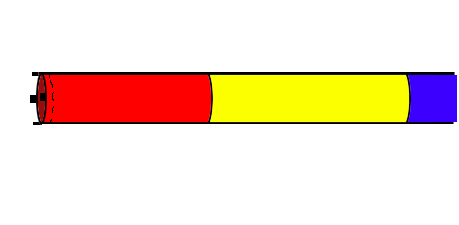
Select your colors. I seem to always use red, yellow and blue. This is what I have chosen to be my colors. A lot of kite builders pick a set of colors to use on most of their kites. This gives a neat look to their collection when flown all at once. |
 |
Cut out the pieces of fabric to use for your tails. You do not have to make all the colors the same length, this can make for a cool design. |
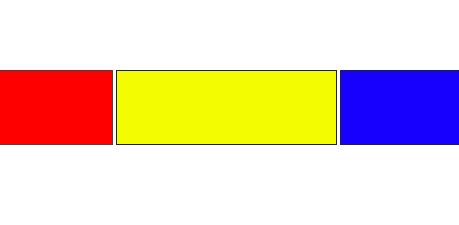 |
Lay your different color pieces out end to to see how it will look when sewn together. Now is the best time to see how the tail will look if you arrange the order of the colors. |
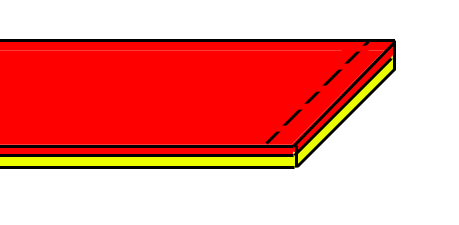 |
Sew a 1/4" seam along the short ends by placing the good sides of your fabric together. Usually you won't need to worry about good sides and bad sides of fabric but you can hide some small flaws on the inside of the tail. |
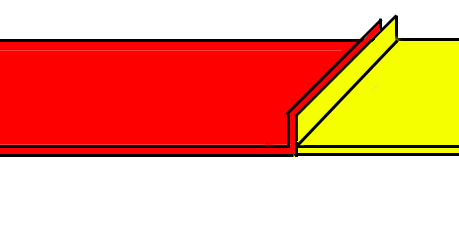 |
Now open up the two pieces and fold the hem over to one side. It helps sometimes to rub your fingers over the seam to crease it down a little better. |
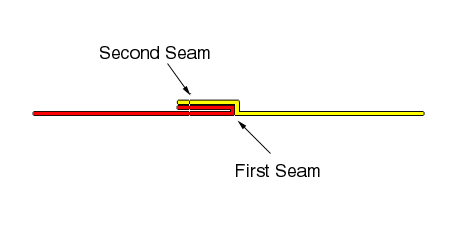 |
Stitch down the two ends you folded over with a straight stitch. Some people use a zig zag stitch which works great also. Repeat this till you have your desired length of tail. |
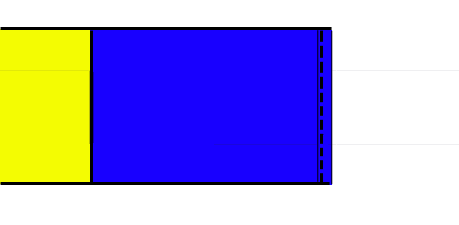 |
Fold over and sew a 1/4" hem at the very end of your tail. |
 |
Now sew the tail along the entire length. You don't have to fold the entire length at once. You can sew a few inches at a time and then line up a few more. It can be one heck of a long seam. I've done tails up to 107 feet. |
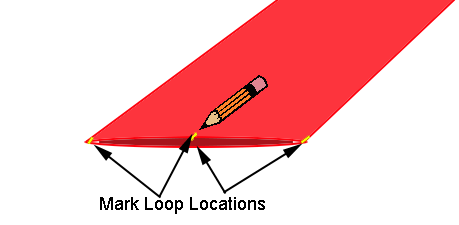 |
I now fold the tail flat and mark the locations for the bridle loops. I put a the marks as shown in the drawing. One in the middle of each side and on the two folds. |
 |
Ok, on the leading edge of my tails I take a 2" piece of grosgrain ribbon and fold it in two. I seal the cut ends of the ribbon quickly with a bic lighter. *Kids, have an adult do this for you. |
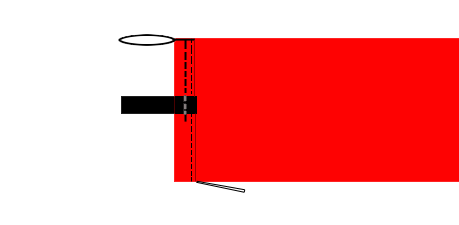 |
Now fold the loops back toward the front of the tail and stitch around the leading edge one more time. |
 |
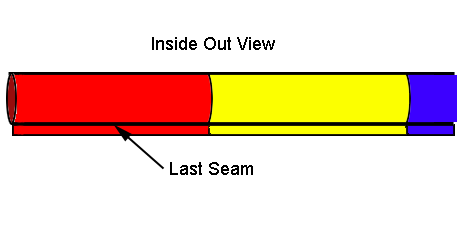
Now the fun part. Turn the tail right side out. The easiest way to do this is reach into the tail and bunch the tail up on your arm. Grab the end of the kite and pull it through the tail. |
|
To finish up the kite tail, attach about a foot of bridle to each of the bridle loops. You can attach a swivel if you wish but you don't really need to. |
All illustrations created in Photoshop by Kevin Nickel of Kitemonger.