How to make inflatable bladders using polyethylene and a soldering ironby S.Alexandrakis, Last update: 4/4/2002 |
 |
Why make inflatable bladders?
You can make inflatable bladders for pool toys, dolls, balls or even kites and it's really cheap.I have been looking into this for quite some time now and this is the most cost effective way to make inflatable thingys. If you do want to make bladders for kites commercialy, beware of the patents that exist on the Wipika kite. You wouldn't want to go to jail for a thing like this, would you?Making inflatable toys is fun!
What you need
- Polyethylene sheet, available at your loval hardware store. It is really cheap and you need the heaviest grade available if you want the bladders to be bomb-proof. You can use garbage bag polyethylene, too, but starting with the thickest material available will give you a better error margin. Starting with a thin material is asking for trouble.
- Polyethylene bottle caps + bottle necks (cut from any recyclable PET bottle).
- A soldering iron. I have a 40Watt soldering iron and it seems to have worked well.
- Masking tape (paper tape). Get the narrowest width possible. The tape I've used so far is about two cm wide, which is about 6 to 7 times the width of the soldering tip.
- Lots of patience.
Total cost
The materials for many bladders cost really cheap. Yesterday I bought a 3m by 2m polyethylene sheet for about 3 Euros and finding a platic bottle cap is the easiest thing of all. So I'd say the materials are dirt cheap... Don't worry, the soldering iron costs less than 30 Euros and you might be able to get one from a friend (if you haven't already got one).
Preparations
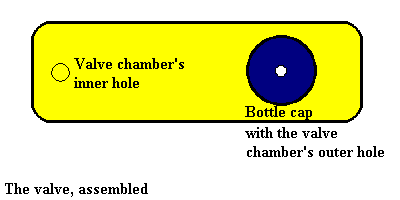
Cut a small rectangular piece of polyethylene and open a hole near one of its edges using the soldering iron. This small piece will be used to form the valve's chamber. |
 |
First phase: Using the soldering iron to make the valve chamber
- Warm up the iron well before attempting to do any hot-gluing operations
- Take the bottle cap and put it on the outside of the first sheet, closed end facing the sheet.
- Turn the whole setup around, so that you can see the bottle cap behind the sheet, with the masking tape on top.
- When the soldering iron has reached a temperature that melts plastic, use it to press the masked tape part of the top sheet onto the bottle cap. This will make the bottle cap adhere to the polyethylene sheet. (Remember, these caps are usually made of polyethylene, that's why they are the only thing that adheres to this plastic).
- Always press on top of the masking tape and try to make circles with the soldering iron. Tear the tape off after you've finished.
Second phase: Joining the valve chamber's inner part
- Turn the sheet around. The cap should be on top now.
- Open a hole in the middle of the cap using the soldering iron. This is where the air comes in from.
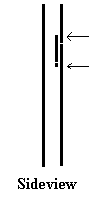
- Put the small rectangular piece of polyethylene under the valve. Make sure that the cap is near the opposite edge of the piece, as farther possible from the hole on the small piece (see the third image). The bigger the distance between these two holes, the more difficult it will be for air to escape.
- Use masking tape to mark where the seams will be made which will stick the top sheet to the small piece.
- Hold the soldering iron and press it down on the two polyethylene sheets while moving it on the seams. When the seams close tear the masking tape.
- By now you should have a single layer of polyethylene with the valve and the valve's chamber on it. The hard part is over now. Time to make this stick to the second layer.
This part will take a bit of practice to find the best speed to move
the soldering iron without either causing the material underneath to burn
or not stick to the other sheet. The speed will depend on the power of
your soldering iron and the thickness of the material. The masking tape
put between the soldering iron and the plastic sheet protects the sheet
from burning and sticking to the soldering tip.
Final phase: Joining the two plastic layers together
Using the method described in the second phase mask the seams on the top layer. Make sure the two layers are aligned well or the shape won't come out as perfect as you had originally planned. Using the soldering iron press over the masking tape to create the seams. Once you have finished use a pair of scissors to cut excess material.Making the valve's cap
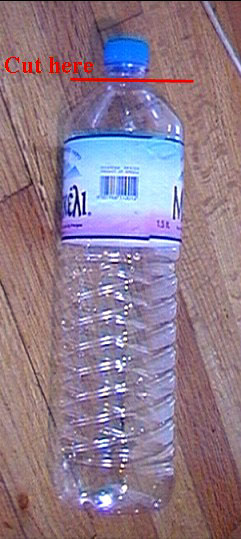
Ok now, if you've followed my instructions closely then you should have an almost airtight valve. The problem is that this one-way valve seems to work well and seal itself only for a certain amount of pressure, that usually is lower than what we expect it to be.Because the valve's outer nozzle is a bottle cap, you can use the same bottle's neck to seal it! Just cut the bottle's neck right next to the part where the cap is screwed on and seal it with adhesive tape. Once screwed on the valve it will make it airtight!
Inflating the bladder
Iit's difficult to use a regular pump unless you come up with an idea how to make a converter to this weird valve system on the bladder. I usually inflate the bladders manually, blowing into the bottle cap. I'm sure there must be a better way though... :-)Deflating the bladder
Ha! It's easier than what you might have though. Just take something like a rounded pencil and push gently the inside of the hole in the cap. This will cause the air inside the bladder to escape through the tunnel you've created. Don't use sharp objects or they might brake the valve's inner chamber material!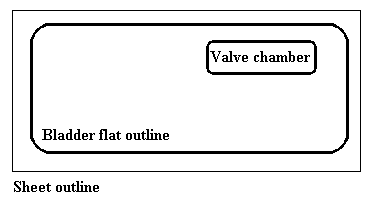 |
 |
 |
 |
Repairing the bladder
You can repair small holes in the bladder using neoprene cement. Neoprene cement can be bought from diving equipment stores and is normally used to repair tears in wetsuits. I have already repaired with neoprene two holes in the two bladders I've made up to now, using the method described above. Both holes were created by overinflation, so try to avoid it! This material wasn't ment to be used for balloons or anything the like, because of its low elasticity.Pictures
I hope you'll like the pictures below. I shot them using my Video camera and the quality isn't really good, I hope they will do the job however. Since making the seams with the soldering iron really is a matter of practice, I have only included photos showing the details of the valve system.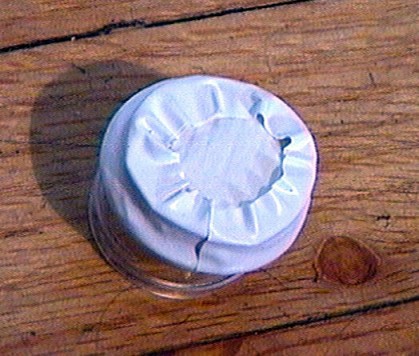 |
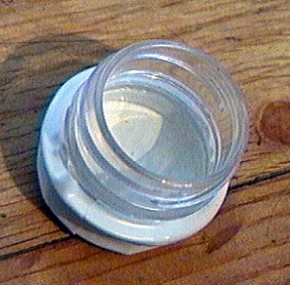 |
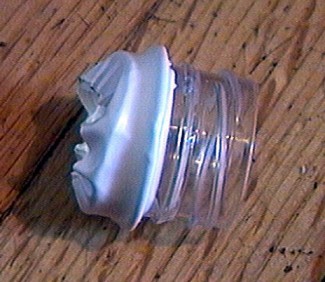
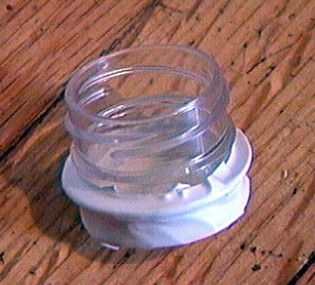
| The cut bottle neck with sealing tape over its cut end. Top view. | Bottom view. This side goes into the blue bottle cap, which is on the bladder. |
 |
 |
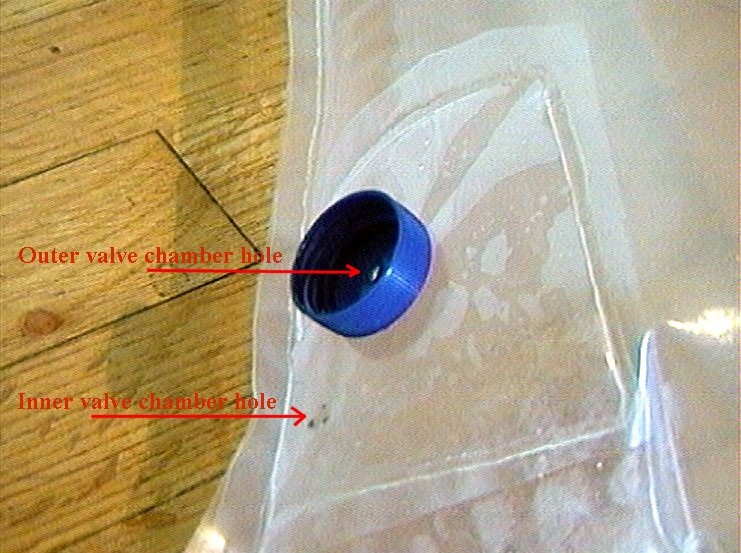
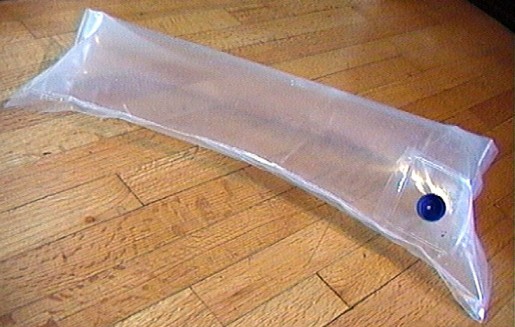
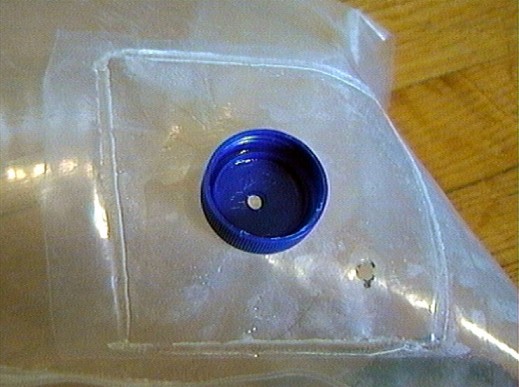
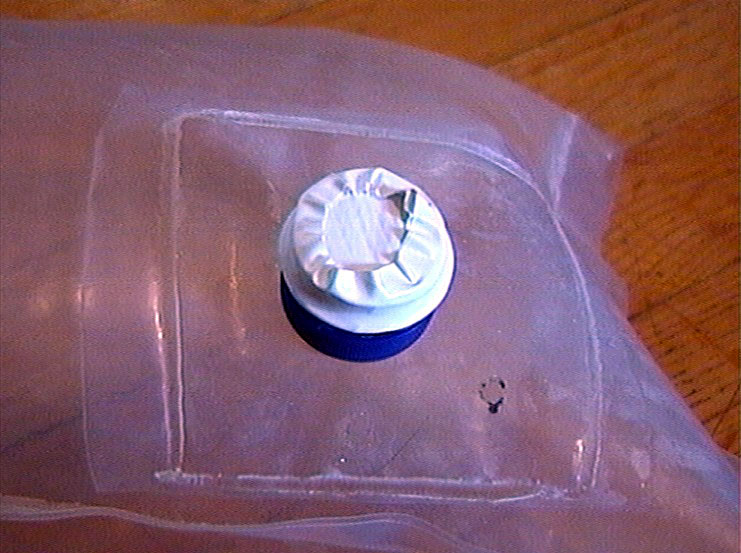
The valve chamber on the bladder. You can see the two holes, one in the blue bottle cap and one in the inner chamber. This setup allows air to flow in the bladder easily. When the air tries to escape the inner bladder membrane sticks to the outer because of the pressure difference between the two chambers, thus making it difficult. To deflate use a round-edged pencil or a pen to push into the outer valve chamber hole. This will cause an air tunnel to be created between the two layers of the valve and air will escape quickly as you press the bladder. |
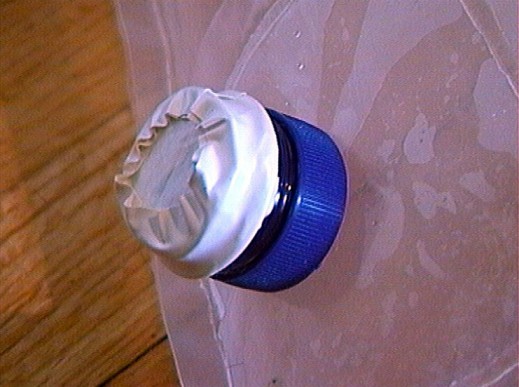
Valve closed. No leaks. |
 |
|
Tadaaaa! |
Have fun!
Stelios